

Can you select the size of your stitching pattern depending on the size of your readily available clothing? “Why are sewing pattern sizes so small?” What is the best pattern sizing that you should select? Here is all the information you require.
Quick Response
“Why are sewing pattern sizes so small”? Although fully prepared sizing has expanded, design sizes remain stayed the same. That is to say, the pattern’s size is determined by 1950s measurements rather than those of the present.
Overview
You may create a personalized fit when you construct your own clothing. Whenever you’ve sewn from a design, you’ve definitely noticed that now the measurements on the designs don’t always match up with what you may find at a department store. Yet we must all ask ourselves, “Why are sewing pattern sizes so small?” before beginning a job.
Measuring is essential
You should be aware of several fundamental body dimensions while selecting a pattern size. Verify your proportions against those listed on the design envelope’s backside. The measure used by each design company is based on a set of standard body dimensions.
Yet, the leading pattern firms base their sizing on a set of uniform body dimensions that are listed on every pattern’s envelope as well as the pattern publications’ back section.
Simply matching your dimensions to these guidelines, you may calculate the size of every design offered by the manufacturer, and you can then acquire that number. However, only a few numbers will precisely fit the conventional proportions of a pattern business.
What is the extent of the distinction?
Mainly in the UK, women typically wear a size 16.
The below dimensions apply to ready-to-wear clothing and are roughly representative of a size 16.
- Forty-two inches (104 cm) around the bust.
- Thirty-three inches (85 cm) around the waist.
- Forty-three inches (108 cm) around the hips.
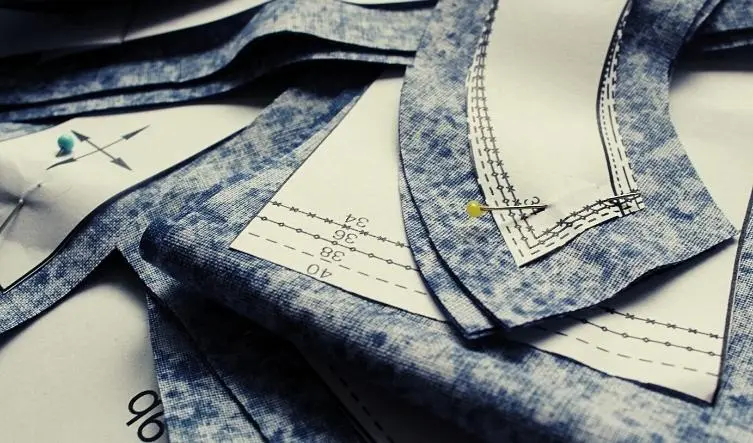
The reverse of a design for a size 16 reads as follows.
Thirty-eight inches (97 cm) around the bust
Thirty inches (76 cm) around the waist.
Forty inches (101 cm) around the hips.
The dimensions of the design are shown to be at least 7 centimeters shorter. This will undoubtedly create a change between things fitting properly versus not being capable of finishing it off!
Why are sewing pattern sizes so small?
The 1950s saw the introduction of standard clothing sizes. They underwent a transformation in the 1970s, and dimensions progressively grew over time.
The term “vanity sizing” implies that sizes are increased to make people feel less self-conscious about their greater stature. Humans were not just leaner but also typically smaller inside the 1950s.
Since post-war food shortages were abolished in 1954, a woman who’d been 30 years old in 1954 would have lived the majority of their life in a period of scarcity. It would have had an impact on her general growth as well as her body weight.
There were a lot more serious diseases affecting children that would have had an impact on growth. People would walk extensively, resulting in fewer vehicles. Mothers carried their kids to school, and housekeeping required far more physical effort in the absence of labor-saving technology.
Today, women are more likely to drive themselves or take public transportation to jobs that may frequently need a significant amount of sitting still. Since humans are often more prominent, so are dress sizes. However, there has been no comparable shift in design sizing.
Pattern proportions have not changed, despite the larger ready-to-wear sizes. A number 16 on a design is thus a size 16 from the 1950s and not a size 16 from today!
How do you decide which design size is best for you?
- Determine your dimensions
Upper bust, whole bust, waistline, and hip measurements should be taken. Maintain a level, parallel line of tape with the ground. Do not tighten the adhesive too much!
2. Study the sizing chart printed on the design
The size that fits you best will depend on how your dimensions relate to the sizing table on the design instructions. Your measurements might very well fall into a range of design sizes.
3. Select a design size that fits your shoulder blades and neck or hips
Determine the design size for one skirt or pair of trousers based on the hip circumference. In order to prevent beginning with a design that is excessively spacious within this area for such an upper chest, the upper bust size is quite helpful.
4. Check the dimensions of the final item
The completed garment’s dimensions can be pretty instructive since they can help you predict how the item will fit you.
5. Use the measuring tape to verify again
Using the measuring tape to determine whether you are comfortable with the level of ease. The waistline or hip would be an excellent place to hold the tapes across the body while you perform the inspection. Consider how that figure feels.
Remind yourself to sit down since standing up causes part of that comfort to be used up. Measuring existing clothing is another method for determining the amount of ease you prefer. Assess the completed garment measurements of an existing object to determine the level of ease you prefer.
6. Verify again by measuring a flat design
Most patterns have a line and circle located on the front of the geometric shapes that indicate the actual size measurements on the design tissue. When considering whether to grade among sizes, these are pretty useful.
FAQ
What defines ease?
The easiness of clothing refers to the extra room it gives you over and beyond the body dimensions.
How does pattern grading work?
Instead of beginning from beginning to draw the design in specific widths, design grading would be the process of expanding or contracting a sewing design through one size.
Pattern grading may be explained simply as the process of enlarging a stitching pattern via hand by cutting it apart, moving all the parts significantly apart, and afterward reassembling the design.
How do I create a chart for my own measurements?

While wearing properly fitted underwear, take your actual waist measurements and write them down. To identify the correct spot, tie a piece of 1/4-inch elastic about the waistline. Use the measuring tape firmly, but not firmly.
1. Height
Stood in front of a wall with barefoot shoes.
2. Back waist measurement
To the customary waistline, from the protruding bone at the base of the neck.
3. Higher bust
Your entire body, including the bust area, is measured in this manner.
4. Complete bust
The bust is measured at its entire point. As was said before, while measuring these measurements, use the bra you plan to wear with the final item.
5. Waist
This represents the size of the waist and hips, which are commonly seen immediately underneath the ribs. Thus, it’ll probably be over your belly button.
6. Hips
The bottom must be included because this is where the hips are broadest.
Conclusion
It’s essential to obtain our body measurements in order to determine what sizes we’ll need for any tailoring projects because, unlike when purchasing clothing from a store, we can’t put them on that before we create them. Every brand owned by the pattern firm has a distinct size scheme.
Never presume that the sewing template size will match the prepared-to-wear number you’re used to purchasing since ready-to-wear measurements and stitching design sizes do not employ the very same methods. By placing the measuring tape tightly about the body at the Chest, Waistline, and Hips, you may estimate yourself.
Making a little record of your personal measurements is thus a wise decision, and you should use it to check again with the size chart of the design every time you start something new.
Watch: HOW TO CHOOSE THE RIGHT SEWING PATTERN SIZE
Read more:
The Exorbitant Price of Linen: Why Is Linen So Expensive?
Everything You Need to Know About Double Brushed Poly Fabric


