

We occasionally find ourselves in circumstances that call for the complete removal of vinyl from garments. Transfers made with iron don’t have to last forever, and there are several techniques to eliminate them if necessary. Or you botched your craft endeavour and need a fast repair – it happens. And you end up googling about how to remove heat transfer paper from shirt? It will be acceptable if you follow our detailed instructions on removing heat transfer paper.
What is heat transfer paper, a.k.a heat transfer vinyl (HTV)?
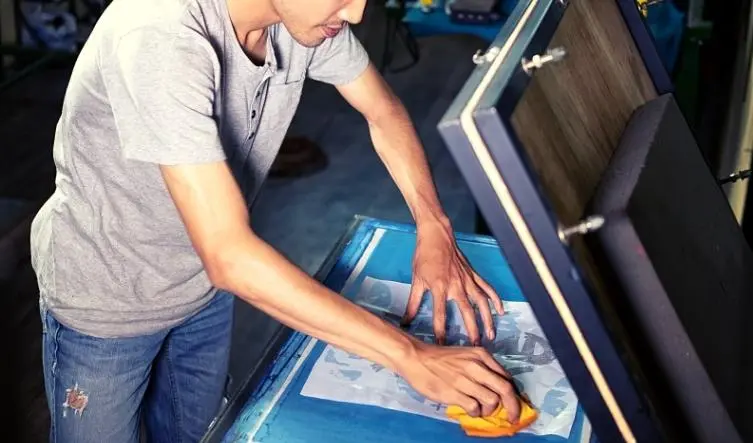
The specific heat-activated adhesive coating on heat transfer vinyl makes it possible for the vinyl polymer to adhere to the cloth. This device is well-liked in the crafting community since it makes it simple for home designers to cut out and make designs that can be applied to t-shirts, bags, and other fabric goods.
HTV is a very well-liked option for home entrepreneurs or crafters due to the popularity of DIY items like the Cricut. An artist may make a digital design using Cricut and similar tools. The machine removes the pattern from the vinyl using a small razor blade.
An artist arranges the vinyl on the cloth using transfer paper after removing the vinyl from the design’s negative spaces. The HTV is then adhered to the fabric using a heat press. Bottom line: Compared to printing a design on a t-shirt, putting a heat transfer vinyl artwork to a shirt requires far less time and effort. Because of this, HTV designs are a popular option for home use and t-shirt manufacturers.
HTV comes in a wide range of weights, finishes, and hues. Usually, it comes as a roll or sheet of extremely thin vinyl. Fortunately, most HTVs react similarly to treatments in this article, so you don’t have to worry about applying different removers for various vinyl varieties.
Why is there a need to remove heat transfer paper?

Crafters most frequently want to remove heat transfer vinyl because they misapplied it or because the vinyl is beginning to flake off an older creation.
Here are some additional reasonings:
- Despite errors, you don’t want to abandon the project. We assure you that removing the vinyl is far simpler than beginning your job fresh.
- You may update worn-out apparel. Have you kept worn-out clothing from your time in ninth grade? Why not give worn-out garments a makeover rather than tossing them away?
- Reuse worn-out materials.
- It’s a relatively easy technique. Learning to remove heat transfer vinyl doesn’t require you to be an expert in design.
How to remove heat transfer paper from shirt?
So, how to remove heat transfer paper from shirt?The vinyl may be removed from clothes using heat, everyday home items, or powerful commercial removers. You will want a few tools.
If you prefer using all-natural items, specific techniques may seem safer even though they take longer than others. You can safely use these techniques if your shirt contains 10% cotton, and you should generally avoid heat-based methods if your shirt has a lot of synthetic material, like polyester. Additional advice for handling polyester is provided further on in this text.
Commercial Vinyl Remover
Commercial vinyl removers break down the adhesive backing, making it simple to peel or scrape the vinyl free. The most important thing to remember when utilising commercial removers is to carefully read the package’s tiny print before using it. For the greatest outcomes, strictly adhere to their directions.
The way most products employ is this, though:
The T-shirt should get turned inside out. Find the vinyl decal’s reverse side. (You can frequently see it through the cloth, and it will feel stiffer.)
- Add a few drops of solvent to the decal’s reverse.
- The clothing should now get turned inside out.
- Pull back and forth while holding a little piece of cloth in your fingertip on either side of the decal. The fibres under the vinyl will get loosened as a result.
- Finally, pluck a piece of the decal’s edge free using tweezers or your fingertips.
- Pull this gently to remove big pieces of vinyl one at a time!
- Run the t-shirt in the washer to remove the solvent and any vinyl leftovers.
Rubbing alcohol
Neither does rubbing alcohol emit unpleasant smells or have any hazardous ingredients. And it’s a lot less expensive than a professional remover!
However, it also doesn’t work as quickly or effectively as the industrial solvent.
- An accessible sink or big bucket should be part of your workstation setup.
- The decal should be facing up on the back of the garment after turning it inside out.
- Hold the garment over a basin or sink.
- Pour rubbing alcohol around the decal’s back. The cloth has to be saturated!
- Then, to free the cloth from behind the vinyl, use your fingers to tug and wriggle it.
- Turn the shirt inside out, then use a knife or tweezers to pry up a pattern edge.
- If the vinyl does not simply pull away, you might need to scrape sections of it carefully.
- If required, you may always re-soak the clothing in alcohol.
- Use cold water to rinse the shirt tunder.
- The petroleum jelly procedure should get used if you see a lot of vinyl residue to free up any remaining pieces of plastic.
Dryer
If you initially set the HTV incorrectly and want to remove the vinyl immediately, the dryer technique often works best, and it won’t function properly with outdated HTV designs. However, since it effectively removes HTV residue, you may also use it as a backup strategy after using another procedure.
Additionally, this approach is the easiest by far. Place the clothing in your washing machine, and after the cycle is over, dry it on a high setting in the dryer.
Scrape off any remaining HTV as you take off the dry shirt!
Petroleum jelly
For how to remove heat transfer paper from shirt, the petroleum jelly process is time-consuming and labour-intensive. But it’s fantastic as a follow-up to any of the techniques mentioned here.
This is how it goes:
- Your shirt should be inside out.
- Place the shirt inside some cardboard to spread and lie flat.
- Massage a tablespoon or more petroleum jelly with your palm in circular motions over the decal’s back.
- Drops of liquid washing detergent should then get added. Over the jelly, rub this in.
- You should now notice glue clumping up.
- To remove the glue, rinse with hot water.
- If required, repeat the procedure.
When you get done applying the HTV, wash the clothing in the washing machine since the petroleum jelly would leave an oily stain.
- Hair dryer
If you’re concerned about breaking your iron, try removing the decal with a hairdryer! You needn’t worry about the vinyl becoming damaged because the hairdryer won’t come in touch with it!
As with any heat-based technique, cotton shirts perform better than polyester tees in this procedure.
- To stop anything from seeping out the back of the shirt, first place a piece of cardboard or perhaps a towel inside the tee.
- The decal side up, lay your garment flat on an iron board at this point.
- Put the hottest setting on your hairdryer.
- Moving the drier back and forth over the sticker while keeping it as near the vinyl as you can without touching it.
- Try peeling up a portion of the decal with tweezers after 30 seconds.
- Continue the heating and scraping procedure to remove the cloth’s pattern.
Final Thought
HTV can get eliminated by utilising heat-based techniques or a heat transfer vinyl remover. Make sure to operate in a well-ventilated area using chemical solvents that produce dangerous vapours.
Using any heat-based technique could be unsettling. While performing it, you could become a little sweaty, but if you adhere to the steps above, you will ultimately get the hang of it.
Watch: Removing a heat transfer
Read more:
Eco Solvent Ink vs. Sublimation Ink: What’s the Difference?
Can You Sublime On Regular White HTV? Ultimate How To Guide!


